
Choose one visible change
A useful first mod has a result you can describe in one sentence. For example: change one configurable item name in an offline test, adjust one exposed value through an established loader, or replace one texture with an original asset of the correct size. These are suggested starting tasks, not claims that each is possible in every game.
Choose a game you own, can launch reliably and are willing to test with a disposable save. Prefer a documented route for your game version. An ambitious crossover might be a good later project, but it adds multiple runtimes, formats and failure points before you know whether your setup works.
The upstream workflow starts with research and recon, then a safe working environment. Follow that order even when the agent offers to jump straight to code.
Inspect before editing
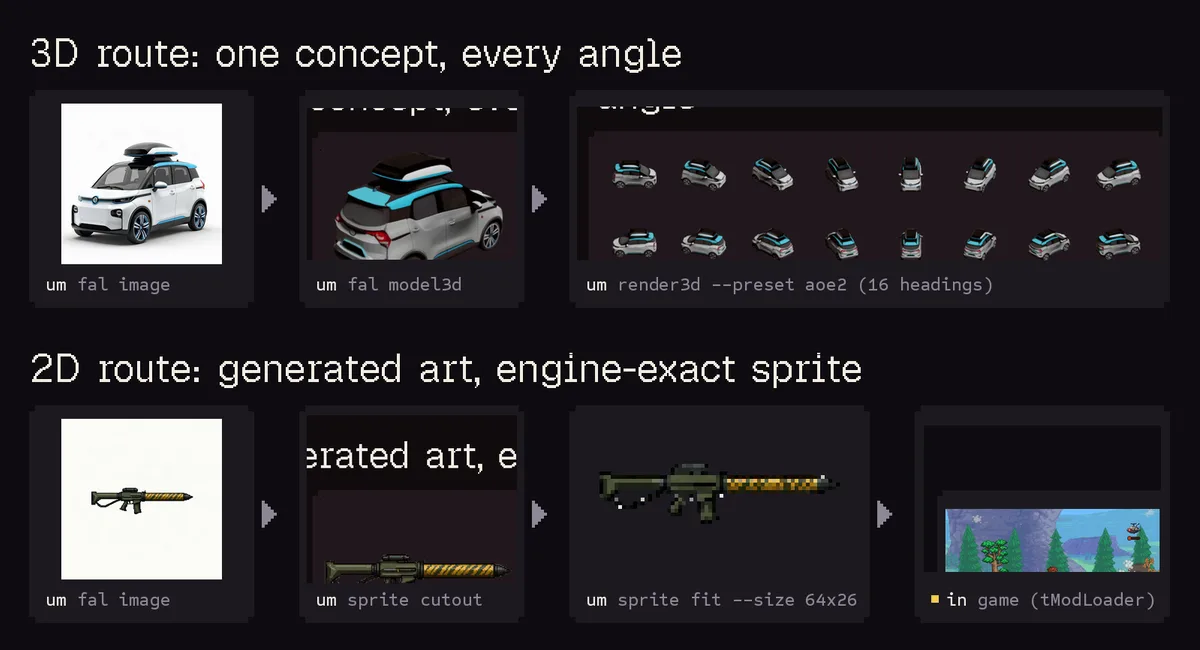
The project illustrates two asset routes: 3D models to directional sprites, and 2D art to a fitted game sprite. View source ↗
Source: Rehan and universal-modder contributors. Game rights belong to their respective owners. Media licenseTell the agent the game's name, exact edition, version and installation path. Say which operating system you use and whether you are running the agent natively or through WSL. Ask it to search the knowledge base and identify the engine, existing mod loaders and relevant save locations.
You can inspect the CLI's available scan options first:
um scan --help
The purpose of recon is to choose a route supported by evidence. Ask the agent to explain the files it plans to read, the loader it expects to use and any version mismatch with the closest field note. A similar engine is a useful clue, but it does not establish the same file layout or mod API.
Stop this stage with a written plan. It should identify one change, where the mod will live, what needs installation, how to test it and how to remove it. Keep approvals for input automation, loader installation and publishing separate, as the project's safety rules require.
Back up the files that matter
Close the game before copying saves. Identify the actual save directory for your edition and profile rather than trusting the first folder with the game's name. Cloud saves can complicate a restore, so understand the game's synchronization behavior before you test with an important save.
Make a separate backup and check that it contains the expected files. Keep a clean copy of anything you plan to edit. Universal Modder has backup, diff and restore commands; read the help for your installed version before choosing a destination:
um backup --help
Do not start by trying an unfamiliar restore command on your only copy. If you test the restore process, use a separate destination and confirm the contents before touching the live save directory. A backup you cannot find or identify is not a reliable rollback plan.
Give the agent a bounded first prompt
Copy this template and replace the bracketed details locally. It describes a task and its limits; it does not promise that the selected game supports the change.
I own [game, edition and version] at [local game path].
I am using [operating system] with [agent].
I want one offline test change: [one visible result].

First, inspect the game and search the Universal Modder
knowledge base. Explain the proposed route, exact files,
required tools, and a rollback plan before making edits.

Use a separate workspace and disposable test save.
Ask before installing a loader or controlling game input.
Build the smallest working version, then give me an
in-game test with a clear expected result.
Do not publish anything or generate paid assets yet.
Read the response before approving execution. If it turns the request into a large redesign, reduce the scope again. If it cannot identify a documented route, let the first session end with a research result rather than unreviewed edits.
Build one working slice
Keep the initial implementation small enough to inspect. Ask which files changed and why. Preserve the original configuration, record the loader and game versions, and keep generated output away from irreplaceable saves.
A successful compiler message is only one checkpoint. It tells you the build completed under that configuration; it does not tell you that the game loaded the mod or that the feature behaves correctly.
Avoid generating a large asset set before the code path works. One placeholder or original test asset can establish size, format, transparency and loading behavior. Once that is proven, you can decide whether a more expensive asset workflow is worthwhile.
Test in the running game
Launch the game through the expected modding route. Use a spare save or test world. First verify that the mod is actually enabled; then perform the exact action that should show your change.
Write down the expected result before observing it. For an item label, that might be the new text appearing in a particular menu. For a configurable stat, choose a repeatable in-game check rather than judging from an impression of faster movement or stronger damage.
Check the game still starts after a fresh launch. Check the original feature when the mod is disabled. Record unexpected behavior, the game version and the shortest steps that reproduce it. These details are much more useful than a screenshot of a successful build alone.
Roll back, then decide what comes next
If the test fails, disable the mod and return to the last known working state. Keep logs and a copy of the failing mod outside the game directory so the agent can investigate without layering new changes over an uncertain setup.
If the test succeeds, save the working code and your test notes before adding features. You now have a baseline. Add one feature at a time and repeat the same checks.
Public packaging is a separate decision. The project prohibits distributing game files and decompiled code; your own mod code, original assets and permitted patches are the intended output. Read the upstream contribution and packaging rules before sharing. For the first session, a working local mod and a clear restore path are enough.
If a step breaks, use troubleshooting. For a more concrete route, compare your setup with the documented game examples.